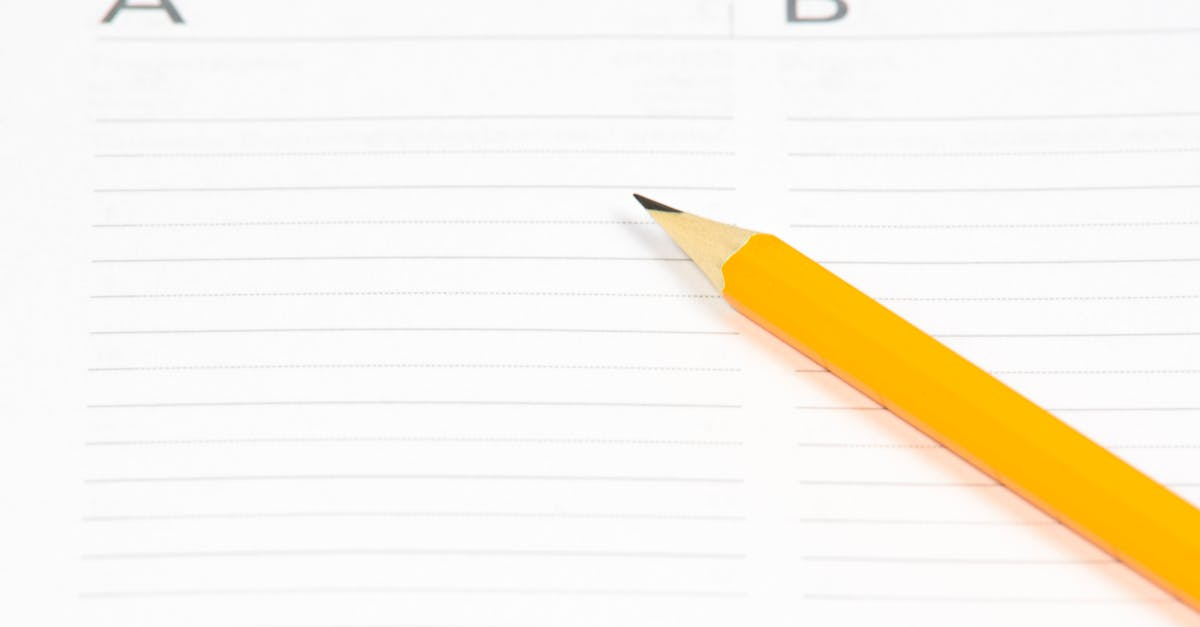
Welcome to a world where creativity flows effortlessly and ideas come to life with every stroke. In this guide, we’ll explore the art of creative sketching with the essential tool that elevates your artistic experience—the perfectly sharpened pencil. The Studio Series Professional Pencil Sharpener is not just a sharpener; it’s your gateway to achieving finer details and smoother lines in your sketches.
Imagine gliding your pencil across paper with precision that transforms your visions into stunning illustrations. Throughout this guide, we’ll unlock techniques and tips that will help you harness the potential of your sharpened pencils, allowing you to express your imagination like never before!

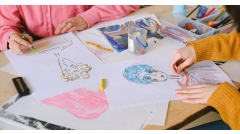
The Studio Series Professional Pencil Sharpener (2 hole) is an artist's secret weapon for achieving perfectly sharpened pencils, essential for detailed sketching and vibrant illustrations. This sharpener features dual hole sizes, making it versatile enough to handle different pencil types with ease. Its durable design ensures longevity, while the compact size allows for portability—perfect for artists on the go. Elevate your drawing experience and unleash your creativity with a tool that is as reliable as it is functional.
Sharpening Techniques
The Studio Series Professional Pencil Sharpener (2 hole) is designed to elevate your creative sketching experience through precise sharpening techniques. Understanding how to properly sharpen your pencils will have a significant impact on the quality of your sketches. Here, we explore a range of sharpening methods to achieve the ideal pencil tip for your artistic needs.
For general sharpening, the first step is to select the correct hole on your sharpener, depending on the thickness of your pencil. Insert the pencil firmly and twist it gently while applying a bit of pressure. This process will create a clean, tapered point suitable for everyday sketching purposes. Next, for precision sharpening, ideal for drawing fine lines and intricate details, use the smaller hole. This allows the pencil to be sharpened to a narrow point. Insert the pencil and gently rotate while occasionally pulling it out to check the sharpness, ensuring you don’t over-sharpen. To achieve broader strokes, gradual sharpening is essential. Start with the larger hole, sharpening the pencil to a chisel-like edge. Then, angle the pencil slightly and sharpen in one direction, creating a broader tip that can deliver softer, sweeping lines.
- Ensure your pencils are of good quality for the best results.
- Clean the sharpener regularly to prevent wood shavings from clogging the holes.
- Experiment with different types of pencils (graphite, colored) to see how varying materials impact sharpening.
- Practice consistently to master the feel of the sharpener and the degree of pressure needed for each sharpening technique.
Maintaining Pencils
To keep your pencils in top shape for creative sketching, regular maintenance is essential. The Studio Series Professional Pencil Sharpener (2 hole) is your best friend in this endeavor, providing precision sharpening to ensure your pencil tips are always ready for your artistic vision. A great rule of thumb is to sharpen your pencils before each sketching session. This ensures they deliver a fine tip, perfect for detailed work and shading. Depending on your usage, this might mean sharpening them every 10-15 minutes during an intense drawing session. The sharper the pencil, the more control you have over your lines, making it essential to maintain that point.
Inspect your pencils frequently for any signs of damage, such as cracks or breaks. Even minor imperfections can hinder performance, causing the lead to break inside the pencil or lead to inconsistency in marks. If you notice any damage, consider replacing the pencil to avoid disruptions to your creative flow. When storing your pencils, invest in a sturdy pencil case or container to protect them from being dropped or impacted, which can lead to breakage. Keep them in a cool, dry place to prevent warping or damage from moisture. Additionally, ensure that your sharpened points are not jabbing into each other—this can cause chipping and dulling over time.
- Sharp pencils yield the best results; sharpen frequently to maintain precision.
- Inspect pencils regularly for any physical damage.
- Store pencils in a protective case to safeguard against drops.
- Avoid placing sharpened pencils point-first into a bag or container.
Choosing Pencil Types
When diving into creative sketching, understanding the nuances of pencil types can drastically enhance your artistic outcomes. Pencils are categorized by their hardness and ability to create a range of textures, which influences the overall feel of your sketches. The most common types include HB, graphite, and colored pencils, each offering unique characteristics that can elevate your work. The Studio Series Professional Pencil Sharpener (2 hole) pairs beautifully with these pencils, ensuring they’re always perfectly sharpened for precise lines and details.
HB pencils are an excellent starting point for any sketcher. They strike a balance between hardness and softness, making them versatile for both light lines and darker shading. Look for HB pencils when creating initial sketches that require both fine detail and bolder strokes. Graphite pencils, available in various grades, allow for dynamic shading and line quality. Softer grades like 2B or 4B create rich black lines and are fantastic for expressive sketches, while harder grades like H or 2H are sharper and ideal for intricate details. Colored pencils open an entirely different realm of creativity. They enable vibrant colors that can bring sketches to life. Look for high-quality colored pencils with rich pigment for smoother application. Selecting the right pencil type for your task can make all the difference.
- HB pencils for initial sketches
- 2B or 4B graphite for shading
- H or 2H for fine details
- High-quality colored pencils for vivid sketches
Using Different Paper Types
Creative sketching transforms with the selection of paper, significantly influencing how sharpened pencils perform on various surfaces. The Studio Series Professional Pencil Sharpener (2 hole) allows sketch artists to achieve the perfect fine point needed for precise detailing, but the paper choice can equally enhance or hinder your artistic process. Smooth paper offers a sleek surface that allows for effortless pencil strokes, making it ideal for detailed sketches and fine lines. When using sharpened pencils on smooth paper, the colors appear crisp and sharp, which is particularly advantageous for projects requiring intricate shading and precision.
On the other hand, textured paper presents a different experience. With its raised fibers, textured paper can grip the pencil lead more effectively, resulting in a variety of marks and effects that some artists find irresistible. This type of paper is well-suited for more expressive sketches where a looser line work and rich textures add character to the artwork. Using the finely sharpened tips from the Studio Series Professional Pencil Sharpener, artists can explore layering techniques or aggressive line work, utilizing the paper's texture to create dynamic visuals. Recommendations include:
- Use smooth papers such as Bristol or hot-pressed watercolor paper for a clean, polished look.
- Textured papers like cold-pressed watercolor paper or drawing paper can create richer, more tactile representations.
- Experiment with mixed media paper that accommodates both pencil and ink for varied artistic styles.
Creating Sketching Techniques
Achieving perfect sketches often hinges on the quality of your tools, particularly your pencils' sharpness. The Studio Series Professional Pencil Sharpener (2 hole) ensures your pencils are finely honed, ready for precision in sketching techniques. To unlock your creativity, mastering techniques such as hatching, cross-hatching, stippling, and blending can elevate your drawings to new heights. Each method serves a unique purpose, allowing for varied textures and depths in your artwork, and using sharply sharpened pencils is vital for achieving intricate details.
Starting with hatching, this technique involves drawing closely spaced parallel lines, which can vary in thickness and spacing for different shading effects. Follow these steps for effective hatching:
- Choose a clean, sharp pencil from the Studio Series. The finely sharpened tip helps create crisp lines.
- Lightly press the pencil to the paper, maintaining consistent pressure as you draw your lines.
- Experiment with line direction; varying angles can add dynamic effects to your work.
For cross-hatching, build upon your hatching technique by crossing lines at various angles. This will create darker areas and a sense of volume. Here’s how:
- Start with a base layer of hatching.
- Add another layer of lines, crossing the first set. The more layers, the deeper the shadow.
- Be mindful of your pencil's sharpness; a well-sharpened pencil ensures fine tips for precise layering.
Stippling requires patience but can produce stunning textural effects. This technique involves making numerous tiny dots. Here's how to practice stippling:
- Utilize the sharp point of your pencil for creating perfect dots.
- Vary the density of dots to control shading; more dots equate to darker areas.
- Keep your hand steady for uniform dot spacing to enhance the overall aesthetic.
Finally, blending allows for a smooth transition between shades, enriching your sketches. To blend effectively:
- Sketch lightly with a sharp pencil, using soft lines to create a gradient.
- Use a blending stump or your finger to gently smudge the pencil strokes.
- For more control, always use a well-sharpened pencil to prevent over-blending.
Sketching Tools
Utilizing perfectly sharpened pencils can significantly elevate your sketching experience. The Studio Series Professional Pencil Sharpener is indispensable due to its dual-hole design, accommodating various pencil sizes while ensuring a precise and consistent point. To fully leverage the potential of sharpened pencils, integrating complementary tools can enhance your artistic process. For example, erasers are vital in the sketching toolkit, aiding in corrections and refining details. Consider using a kneaded eraser, which not only allows for gentle corrections without damaging the paper but also enables the creation of highlights by lifting graphite. This versatility ensures you maintain clean lines and accurate proportions in your drawings.
In addition, blending stumps, also known as tortillons, serve as excellent tools for creating smooth transitions and softening edges in pencil drawings. These make it easy to blend your pencil strokes, allowing for nuanced shading and depth. Moreover, employing a ruler can enhance precision in your sketches, particularly when drawing architectural images or geometric shapes. By guiding your pencil, rulers help establish straight lines, providing a solid foundation upon which to build your artwork. Together with the Studio Series Professional Pencil Sharpener, these tools will not only streamline your sketching process but also significantly improve the quality of your finished pieces.
- Kneaded erasers - perfect for subtle corrections and adding highlights
- Blending stumps - ideal for smooth transitions and shading
- Rulers - essential for precision and structure in drawings
Setting Up a Workspace
Creating an efficient and inspiring sketching workspace is essential for anyone passionate about creative sketching with perfectly sharpened pencils. When organizing your space, start by selecting a dedicated area where you can focus on your art. Choose a flat, sturdy surface that is large enough to accommodate your sketchbook, tools, and the Studio Series Professional Pencil Sharpener, which will be a critical component of your setup. A clean and minimal environment can help reduce distractions and foster creativity.
Lighting plays a crucial role in your sketching experience. Position your workspace near a window to take advantage of natural light, which can illuminate your sketches beautifully. If natural light isn’t available or is inconsistent, invest in adjustable LED task lighting to ensure you have adequate illumination at all times. Additionally, consider using a comfortable chair that promotes good posture. Adjustable stools or ergonomic chairs are ideal, as they allow you to maintain an optimal working position, whether sitting or standing.
- Keep your Studio Series Professional Pencil Sharpener within arm’s reach to make quick adjustments to your pencil tips as you work.
- Utilize organizers or caddies to keep your sketching tools tidy—think about creating designated spots for your pencils, erasers, and other materials to reduce clutter.
- Try to arrange your tools in a way that is intuitive, so you can grab what you need effortlessly as inspiration strikes.
- Consider adding a few personal touches to your space, like artwork or plants, to spark your creativity and make it feel more inviting.
Related Products


Avoiding Common Mistakes
Creative sketching can be a delightful experience, but using a subpar pencil sharpener or not sharpening your pencils correctly can lead to frustrating mistakes. The Studio Series Professional Pencil Sharpener (2 hole) is specifically designed to help you achieve the perfect point for your sketching needs. However, even with the best tools, common errors can occur. Recognizing these pitfalls can significantly enhance your sketching experience and perfect your technique.
One major mistake many sketchers make is failing to keep an eye on their pencil's tip. A blunt tip can lead to imprecise lines, making it challenging to capture the nuances of your subject. Regularly checking and sharpening your pencil with the right technique can prevent this. Utilize the smaller hole for finer points, especially when working on intricate details. Moreover, sharpening too aggressively can create jagged edges. To avoid this, gently insert the pencil and rotate it lightly in the sharpener to maintain a smooth angle. When a pencil breaks or becomes misshapen, it can be tempting to press harder; instead, take a moment to re-sharpen for the perfect point. Here are additional tips to enhance your sharpening technique:
- Always start with clean pencils to avoid clogging the sharpener.
- Rotate the pencil slowly to maintain even sharpening.
- Alternate between both holes in the sharpener to refine the shape.
- Be gentle with softer leads to avoid breakage.
Another common issue arises from not adjusting your sharpening technique based on the type of pencil you are using. The Studio Series Professional Pencil Sharpener accommodates different pencil sizes, but understanding the type of lead is crucial. For softer leads, use the large hole sparingly, as it can create a too-thick point that may press down while sketching. Instead, take light passes with the small hole. If you encounter a situation where you’ve sharpened too much, check the angle of the point. A balanced tip should form a fine point that doesn’t compromise the lead integrity. Consistency in pencil maintenance ensures you won’t find yourself with uneven lines halfway through your sketch. Additional reminders include:
- Label your pencils based on hardness for easy access.
- Use the right hole for the pencil size to avoid excessive wear.
- Keep the sharpener clean to ensure optimal performance.
- Practice sharpening regularly to develop a feel for the process.
Incorporating Color
Using colored pencils alongside your perfectly sharpened graphite pencils can elevate your creative sketching process. The Studio Series Professional Pencil Sharpener (2 hole) ensures that your pencils are always finely pointed, enabling precise control as you blend the hues and play with contrasts. With sharp edges, your colored pencils can define shapes and create stunning gradients, making every stroke feel effortless. Begin by sketching your outline in graphite, utilizing the precise point created by the sharpener for intricate details. Once your base drawing is established, add color thoughtfully, integrating colored pencils that harmonize with your graphite foundation.
Layering is an essential technique when working with colored pencils. Apply light, even strokes to establish a base layer of color, then gradually build up the richness by layering darker tones atop the foundation. This method not only deepens the color but also introduces dimension and depth to your artwork. Mixing colors can produce unique shades, so don’t hesitate to experiment; overlapping different hues can lead to unexpected yet delightful results. For highlights, try using the whites or lighter shades of your colored pencils to create contrast against darker colors, enhancing the overall effect of light on your sketch.
- Utilize the sharpener to maintain the precision of both your colored and graphite pencils.
- For smooth transitions, try blending techniques with a colorless blender pencil or use a cotton swab to lightly haze and mix colors.
- Create texture by varying pressure on the colored pencils—apply less pressure for soft, light areas and more for bold, dark sections.
Sketching for Different Styles
Mastering artistic styles through sketching requires a sharp pencil, and the Studio Series Professional Pencil Sharpener (2 hole) ensures that your pencils are perfectly sharpened, achieving precise lines and subtle details necessary for realism, cartoons, and abstract art. When sketching with a finely honed pencil, the artistic possibilities are limitless. Each style has unique characteristics that can be enhanced through different techniques.
For realism, a sharp pencil allows for meticulous control, enabling you to capture intricate details and textures. Practice by sketching a still life arrangement; focus on shading and blending techniques using varying pressure on your sharpened pencil. For cartoons, the emphasis shifts to character expression and bold outlines. Try drawing exaggerated features with clean, smooth lines—your sharp pencil will help emphasize these elements. When venturing into abstract art, utilize the pencil for both definition and striking spontaneity. Experiment with quick, random strokes and spontaneous shading to express freeform creativity. Engage with various exercises:
- Realism: Create a detailed study of a fruit bowl.
- Cartoons: Design a simple character and explore different facial expressions.
- Abstract: Fill a page with intersecting lines and shapes, allowing your emotions to guide you.
Why We Chose This Product
As we wrap up this guide on creative sketching, it’s important to reflect on why I chose the Studio Series Professional Pencil Sharpener as the centerpiece of our sketching journey. This tool not only promises precision but also enhances the overall sketching experience, making it a vital component in every artist's toolkit. It embodies the perfect blend of functionality and craftsmanship, ensuring that your pencils remain sharp and ready for your creative endeavors.
- Designed for two hole sizes to accommodate various pencil types
- Durable construction for long-lasting use
- Effortless sharpening mechanism for perfect points every time
- Compact design for easy portability
By integrating this sharpener into your routine, you’re investing in the quality of your work. It’s the small details, like precise sharpening, that make all the difference in your artistic expression. So gear up, grab your sharpened pencils, and let your imagination soar with every sketch!
The Studio Series Professional Pencil Sharpener (2 hole) is an artist's secret weapon for achieving perfectly sharpened pencils, essential for detailed sketching and vibrant illustrations. This sharpener features dual hole sizes, making it versatile enough to handle different pencil types with ease. Its durable design ensures longevity, while the compact size allows for portability—perfect for artists on the go. Elevate your drawing experience and unleash your creativity with a tool that is as reliable as it is functional.