Welcome to a world where the simple act of sharpening a pencil transforms into an art form! In this guide, we’ll unlock the potential of the Studio Series Professional Pencil Sharpener to create captivating and unique pencil shavings that can elevate your artistic projects in surprising ways. Whether you’re a seasoned artist, a craft enthusiast, or just looking to add a personal touch to your work, these exquisite shavings can serve as the perfect medium for your creativity.
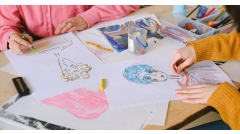
Imagine vibrant colors swirling together as you expertly craft shavings that can be used in collage art, decorative projects, or even as unique bookmarks. The possibilities are infinite! With this guide, you’ll not only learn the techniques for achieving the best results but also discover how to showcase these beautiful creations. Let’s embark on this artistic journey together!

The Studio Series Professional Pencil Sharpener is the ultimate tool for artists and crafters looking to enhance their creative projects with unique pencil shavings. Featuring two holes to accommodate different pencil sizes, this sharpener is designed for precision and durability. With its ability to produce vibrant and intricate shavings, it's perfect for everything from collages to DIY decorations. Elevate your artistic journey with this essential sharpener and discover the hidden beauty in every shave!
Gathering Your Materials
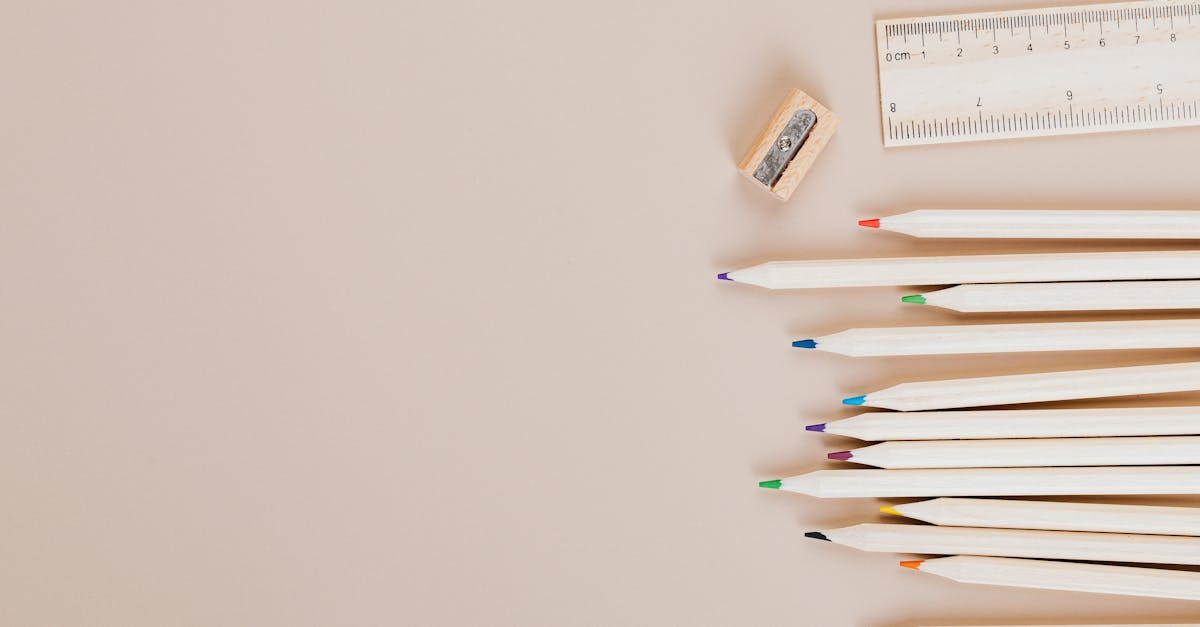
To begin crafting unique pencil shavings for your artistic projects, it’s essential to gather the right materials to ensure you achieve the highest quality shavings. Start with a selection of colored pencils that will not only provide a vibrant palette but are also designed for artistic use. Premium brands such as Prismacolor or Faber-Castell offer rich pigments and smooth application, making them ideal choices. You will want to choose a variety of colors to create stunning visual contrasts in your artwork.
Don’t overlook the significance of paper in your projects. Different types of paper, including watercolor paper, crafting paper, or even recycled paper, can add unique textures and styles to your final creations. The thickness and surface finish of the paper will influence how well the pencil shavings adhere and blend into the design, so experiment with several options to see what works best for you. For an even more polished finish, consider optional supplies such as scissors for precise cutting, glue for secure attachment, or a spray sealer to protect your finished projects and enhance their longevity.
- Studio Series Professional Pencil Sharpener (2 hole) - essential for achieving perfect, consistent shavings.
- Colored pencils (Prismacolor, Faber-Castell) - for rich, vibrant colors.
- Variety of papers (watercolor, crafting, recycled) - adds texture and style.
- Scissors - for precise cutting of paper and shaping shavings.
- Glue - to secure your pencil shavings in artistic projects.
- Spray sealer - to protect and finish your creations.
Preparing Your Workspace
Getting your workspace ready for crafting unique pencil shavings involves creating a clean and organized area tailored to your artistic needs. Start by selecting a flat, sturdy work surface, such as a tabletop or desk, that allows ample room for all your tools and materials. Having a designated space helps maintain focus, and when working with art supplies like the Studio Series Professional Pencil Sharpener (2 hole), ensuring your environment is conducive to creativity is essential.
Before you begin, lay down a protective covering on your work surface to catch any pencil shavings that may scatter during the sharpening process. Options like a large plastic sheet, butcher paper, or a silicone mat can work effectively. This not only helps keep your workspace tidy but also allows for easy cleanup. Additionally, gather necessary tools such as a small container or jar to collect the shavings, making it easier to manage and store them for your artistic projects later on. Consider using the following items for an efficient setup:
- Studio Series Professional Pencil Sharpener (2 hole)
- Large plastic sheet or silicone mat
- Small container or jar for collecting shavings
- Art supplies or drawing materials for your project
- Brush or dustpan for easy cleanup
Sharpening Techniques
The Studio Series Professional Pencil Sharpener (2 hole) is designed to create precise and artistic pencil shavings that can enhance your creative projects. By experimenting with the sharpening angles, you can produce unique shavings that vary in shape and texture, adding a distinctive touch to your artwork. This sharpener features two different holes, each suited for various pencil sizes, enabling you to explore a range of creative outcomes.
When sharpening with the Studio Series Professional Sharpener, consider the following techniques to achieve unusual shavings:
- Angle Adjustments: Adjusting the angle at which you insert the pencil can drastically alter the shape of the shavings. For a finer point, insert the pencil at a steeper angle; for wider, spiral shavings, try a more horizontal approach.
- Pressure Control: Varying the pressure while rotating the pencil will affect the thickness and curl of the shavings. Lighter pressure results in delicate, thin shavings, while applying more force will yield heavier curls.
- Rotational Direction: Try sharpening in both directions. A clockwise rotation might create one type of curl, while counterclockwise might bring about a completely different texture.
- Multiple Sharpening Attempts: Don’t be afraid to sharpen the same pencil multiple times, changing your approach with each attempt. This could yield an interesting mix of shavings, especially when combining techniques.
Play around with the two holes available in the Studio Series Professional Sharpener. Use the larger hole for thicker pencils, which may produce chunkier shavings, while the smaller hole is perfect for producing finer, more delicate pieces. Embrace the experimentation process:
- Combine shavings of different textures in your art for added depth.
- Try using colored pencils to see how the color influences the aesthetics of the shavings.
Creating Shaving Art
Transforming ordinary pencil shavings into captivating art can be an exciting project, especially when using the Studio Series Professional Pencil Sharpener (2 hole). This dual-hole sharpener allows for precision shavings that are perfect for your artistic endeavors. Begin by selecting a variety of colored pencils to create diverse shavings that will add depth and interest to your artwork.
After collecting your pencil shavings, lay them out on a clean surface. Experiment with arrangements to find pleasing shapes or scenes. Think of natural forms like flowers, trees, or abstract patterns. To securely attach the shavings to your canvas or thick paper, follow these steps:
- Use a strong adhesive glue or a glue stick, which will provide a sturdy hold without causing the shavings to warp.
- Apply a thin layer of glue to the area where you want to place the shavings.
- Carefully position each shaving, pressing down gently to ensure they lay flat.
- For added texture, layer shavings of different sizes, with some being finely shaved and others chunkier, to create dimension.
- Consider experimenting with different patterns, such as spirals, waves, or even heart shapes, using the shavings to outline or fill in sections.
Once your design is complete, allow the glue to dry thoroughly. To further enhance the final piece, you might consider incorporating paint or other materials, creating a mixed-media effect. Other ideas include:
- Creating a landscape scene by using green shavings for grass, browns for trees, and blues for the sky.
- Crafting a portrait or abstract face using shavings for hair or features.
- Designing geometric patterns with uniform pencil shavings to add a modern twist.
Color Mixing Effects
Using the Studio Series Professional Pencil Sharpener (2 hole), you can explore the fascinating world of color mixing effects through your pencil shavings. By sharpening colored pencils while varying the combinations of hues, you can achieve captivating and unique shavings that add an artistic flair to your projects. For instance, start by selecting a vibrant red pencil and follow it with an orange pencil. The resulting shavings will exhibit a beautiful gradient effect, showcasing the reddish-orange hues that merge during the sharpening process. This technique can unlock an array of visual possibilities, bridging the gap between coloring and creativity.
To maximize the mixing potential while sharpening, consider these strategies:
- Choose pencils with similar undertones to create harmonious blends, for example, using cool-toned blues with purples.
- Experiment with contrasting colors to produce surprising effects, such as pairing yellow with purple, producing shavings with a striking visual impact.
- Vary the pressure while sharpening to control the amount of color that mixes, leading to either soft or bold shavings depending on your artistic needs.
Mixing colors during sharpening allows you to unleash your imagination. Keep in mind how different combinations yield distinct aesthetics. Engaging with the Studio Series Professional Pencil Sharpener opens up a playful exploration of color, leading to enchanting shavings that can elevate your artistic projects.
- Try utilizing a light touch for lighter blends, and firmer pressure for intense effects.
- Collect shavings in separate containers based on color combinations for future use.
Embedding in Resin
Transform your artistic vision into reality by embedding unique pencil shavings in resin. The Studio Series Professional Pencil Sharpener (2 hole) is the perfect tool to create stunning shavings that can add both texture and color to your resin projects. Begin by gathering essential materials: your sharpened pencil shavings, epoxy resin kit (including resin and hardener), mixing cups, stir sticks, protective gloves, a respirator mask, and a suitable workspace covered with plastic or newspaper to prevent mess. Ensure your area is well-ventilated, as resin can release toxic fumes while curing.
Start by mixing the resin according to the manufacturer's instructions. Measure equal parts of resin and hardener and pour them into a mixing cup. Stir thoroughly for at least 3-5 minutes to ensure a homogeneous blend. Once mixed, you can add your pencil shavings. Pour the shavings directly into the mixture, gradually folding them in to achieve an even distribution throughout. After achieved the desired look, pour the resin into your chosen mold and gently tap or shake it to eliminate air bubbles. Let the resin cure completely, typically for 24-48 hours, depending on the product specifications. Ensure you are wearing gloves and a mask throughout this process for safety.
- Gather your materials before starting the project.
- Ensure your workspace is protected and well-ventilated.
- Carefully mix the resin and hardener to avoid uneven curing.
- Experiment with different colors and types of shavings for varied effects.
Preserving Shavings
Pencil shavings can be transformed into beautiful works of art, but their integrity can fade over time without proper preservation techniques. The Studio Series Professional Pencil Sharpener (2 hole) creates meticulously tapered shavings that enhance any artistic project. To ensure these delicate creations maintain their vibrancy and shape, employing effective preservation methods is vital.
One popular approach is to use a fixative or sealant to protect the shavings. Here’s how to do it:
- Gather your pencil shavings from the Studio Series sharpener.
- Select a clear spray fixative designed for artwork, which can be found at most art supply stores.
- Place shavings on parchment paper or a well-ventilated area to avoid sticking.
- Spray the fixative from a distance of about 12 inches to coat the shavings lightly without saturation.
- Allow the fixative to dry completely before handling the shavings.
Storing your shavings in an appropriate manner is equally important. Use airtight containers or small zip-lock bags to keep out moisture and dust, which can degrade quality. Ensure the shavings aren’t crammed together to prevent flattening. Follow these tips for optimal storage:
- Choose transparent containers to easily view the shavings while protecting them from environmental factors.
- Organize by color or type for quick access during projects.
- Keep containers in a cool, dry place away from direct sunlight to help preserve color.
Related Products


Incorporating into Craft Projects
Crafting unique pencil shavings using the Studio Series Professional Pencil Sharpener (2 hole) opens a world of creative possibilities beyond traditional art. Pencil shavings can add a distinctive touch to various craft projects, such as personalized greeting cards, unique decorations for picture frames, and innovative mixed-media art pieces. The sharpener creates long and thin shavings that can be easily manipulated, painted, or arranged into meaningful designs.
For creating greeting cards, consider using shavings to form intricate patterns or shapes on the front of the card. Glue the shavings down with a strong adhesive like craft glue or Mod Podge to ensure they stay in place. Decorate a picture frame by gluing shavings along the edges for a textured border that adds character. For mixed-media art, layer the shavings with paint, fabric, or other materials, allowing their natural color variations to blend beautifully. To ensure all attachments are secure and aesthetically pleasing, take care to evenly distribute glue and allow ample drying time before moving or displaying your projects.
- Combine colored shavings for a vibrant, eye-catching look.
- Experiment with layering shavings under a clear resin for depth.
- Use shavings to fill small glass jars or terrariums for decoration.
Cleaning the Sharpener
Maintaining the Studio Series Professional Pencil Sharpener is essential for crafting unique pencil shavings that enhance your artistic projects. To clean your sharpener effectively, begin by disconnecting the device from power. This precaution ensures safety while handling the sharpener. Next, open the compartment where the pencil shavings accumulate. Most sharpeners, including the Studio Series, feature a removable drawer or container for easy access. Carefully pull this drawer out and dispose of any shavings inside. If it’s stuck, gently tap the sharpener against a soft surface to loosen the debris, making removal easier.
Once you've emptied the shavings compartment, take a soft brush or a small vacuum attachment to remove any remaining particles from inside the sharpener. A damp cloth can also be effective for cleaning the exterior and removing any residue that could interfere with performance. To prevent future build-up, regularly clean the sharpener after each extensive use. Moreover, ensure that only high-quality pencils—those free from excess varnish or wax—are used to minimize shavings that may cling to the sharpener’s blades.
- Regularly check and clean the pencil holder area to avoid pencil fragment accumulation.
- Periodically inspect the sharpener for any wear or damage to blades; replace them as necessary.
- Keep the sharpener in a dry location to prevent moisture-induced rust, which could degrade sharpness.
Experimenting with Techniques
Using the Studio Series Professional Pencil Sharpener (2 hole) can lead to the discovery of a treasure trove of unique pencil shavings that are perfect for your artistic endeavors. These sharpeners not only create fine, tapered shavings but also allow you to experiment with various techniques to bring a new dimension to your artwork. Think of your pencil shavings as vibrant, miniature canvases waiting to be transformed into textured art pieces. Embrace the playful spirit of innovation by trying out different methods for incorporating these shavings into your projects.
Start by layering the shavings on a base surface. You can sprinkle a combination of colorful shavings on your canvas or paper and then press them down to form a multi-dimensional effect. To enhance this technique, consider mixing your pencil shavings with other materials such as glitter, sand, or crushed leaves to create exciting contrasts in texture and color. Using various adhesive techniques will further elevate your projects. For instance, you can use spray adhesive for a thin, even application or a glue stick for precise placement. Feel free to explore these options:
- Creating a mosaic-like pattern with shavings of different colors.
- Utilizing layers of shavings to form a three-dimensional effect.
- Combining shavings with acrylic paints or watercolors to add depth.
Why We Chose This Product
Choosing the Studio Series Professional Pencil Sharpener for this how-to guide was a deliberate decision, as its design and functionality empower artists to get the most out of their pencil shavings. This sharpener ensures precision and quality, allowing users to achieve intricate and aesthetically pleasing shavings effortlessly. The ease of use is perfect for newcomers and experienced creators alike, making it an essential tool for any artistic endeavor.
- High-quality sharpness for perfect shavings.
- Two holes for various pencil sizes.
- Durable construction for long-lasting use.
By employing this remarkable sharpener, creators will gain a deeper appreciation for what pencil shavings can become. Every piece can turn into a work of art, and your projects will undoubtedly stand out. Let your imagination take flight!
The Studio Series Professional Pencil Sharpener is the ultimate tool for artists and crafters looking to enhance their creative projects with unique pencil shavings. Featuring two holes to accommodate different pencil sizes, this sharpener is designed for precision and durability. With its ability to produce vibrant and intricate shavings, it's perfect for everything from collages to DIY decorations. Elevate your artistic journey with this essential sharpener and discover the hidden beauty in every shave!