Welcome to your creative journey with the world of calligraphy! With Prismacolor's Premier Double-Ended Art Markers at your fingertips, you're about to unlock a vibrant palette that transforms your writing into art. These markers are designed not only for precision but also for creating the stunning strokes that define beautiful calligraphy. The fine and chisel tips offer versatility, making it easier than ever to express your unique style.
As you dive deeper into this guide, you'll discover techniques that bring your letters to life, connecting you with the ancient art of calligraphy in exciting new ways. The smooth flow of ink and rich pigments will inspire your creativity, allowing you to experiment without limits. Get ready to make each stroke a work of art!

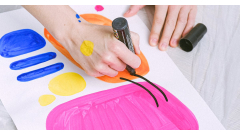
Prismacolor Premier Double-Ended Art Markers elevate any artistry with their fine and chisel tips, perfect for intricate designs and expressive lettering. This 12-pack offers a wide range of vibrant colors, allowing for creative expression across various projects. The dual-ended design ensures versatility, letting artists shift from detailed lines to bold strokes effortlessly. Whether you're a beginner or an experienced calligrapher, these markers provide a smooth ink flow and rich pigmentation, making them an ideal choice for anyone looking to enhance their artistic journey.
Getting Started
Embarking on a journey into the elegant world of calligraphy with the Prismacolor Premier Double-Ended Art Markers, Fine and Chisel Tip, 12 Pack is an exciting endeavor. These markers are unique due to their dual tips, allowing for the flexibility to create fine lines or broader strokes, perfect for varying styles in lettering. To kick off your calligraphy exploration, begin by selecting an appropriate surface. Smooth paper or calligraphy practice pads designed for markers work best, as they prevent bleed-through and allow for clean, crisp lines. Consider the texture of the paper carefully; a too-rough surface may hinder your precision and flow.
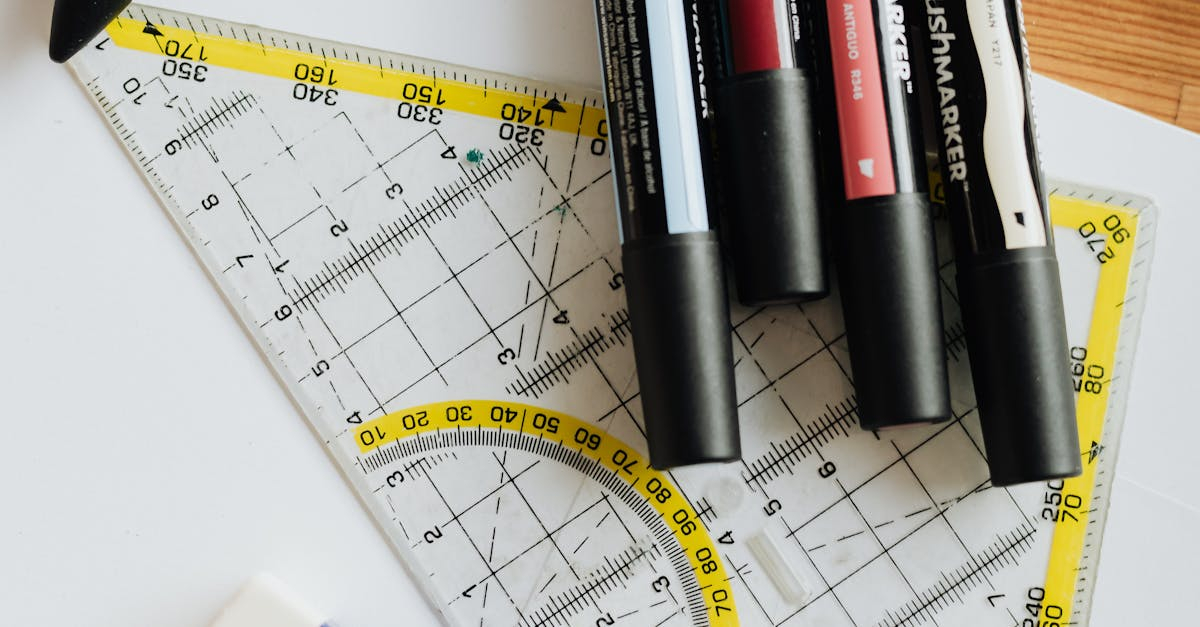
Next, setting up a workspace conducive to creativity is essential. Choose a well-lit location that inspires you. Your workstation should be comfortable, with all necessary supplies at hand, including your Prismacolor markers, paper, a ruler for straight edges, and any additional tools you might want, like a pencil for sketching initial designs. Arrange everything neatly to minimize distractions and enhance your focus.
- Ensure good lighting to see the colors vividly.
- Include a variety of paper types for experimenting with different styles.
- Have reference materials or inspirational images accessible to spark creativity.
Basic Strokes Techniques
Unlock the art of calligraphy with the Prismacolor Premier Double-Ended Art Markers, Fine and Chisel Tip, 12 Pack by mastering essential strokes that form the foundation of beautiful lettering. These markers provide a versatile experience with their fine tip for precise details and a chisel tip for wider strokes, essential for creating various calligraphic effects. Begin by practicing the fundamental strokes that will become the building blocks for your calligraphy style.
Start with the **Thin Upstroke**, which requires using the fine tip. Hold the marker at an angle of approximately 45 degrees, applying very light pressure as you lift the pen from the bottom to the top of your letter. This stroke should feel effortless, inviting an airy touch to your writing. Next, move on to the **Thick Downstroke** using the chisel tip. Position the marker vertically, applying firm pressure as you glide it downwards. It’s crucial to maintain consistency in width; practice this stroke repeatedly to develop muscle memory. Progress to the **Compound Stroke**, which combines both thin and thick strokes. Begin with a thin upstroke and follow it with a thick downstroke. Follow these patterns with the **Oval Stroke**, which helps in creating loops and curves, essential for letters such as 'o' and 'e'. Alternate between the two tips to explore how each stroke can transition and flow into the next.
- Use the fine tip for delicate details and accents.
- The chisel tip is ideal for bold headers and emphasis.
- Pay careful attention to the angle and pressure applied with each stroke.
- Keep a practice sheet handy to refine your technique over time.
Letter Formation
Exploring calligraphy using the Prismacolor Premier Double-Ended Art Markers, Fine and Chisel Tip, 12 Pack, can be a delightful experience. With their versatile tips, these markers enhance your lettering skills by offering both precision and bold strokes. To begin forming letters, it's essential to get familiar with each tip. The fine tip is perfect for intricate details, while the chisel tip allows for broad strokes, perfect for creating thicker segments in your letters. Make sure to choose a smooth, high-quality paper to ensure your ink flows seamlessly.
When practicing uppercase letters, start with the basic shapes that characterize each letter. Here's a breakdown of some common uppercase letters, with visual cues in mind:
- A: Start with an apex, draw diagonal lines down to form a triangle. Connect the midpoint with a horizontal bar.
- B: Create a vertical line, then add two rounded shapes for the 'bowl' of the letter — the top bowl larger than the bottom.
- C: Form a crescent shape with a smooth curve, starting from the top and curving downwards.
- D: Similar to 'B', but with a single rounded bowl on the right side of a vertical line.
- E: Begin with a vertical line, then add three horizontal lines — one at the top, middle, and bottom.
Now, let’s shift focus to lowercase letters. These benefactorly maintain a playful charm. Here’s how to effectively form them:
- a: Create an oval shape, followed by a line that loops above and back into the oval.
- e: Start with a small oval shape, then create a horizontal tail on the middle right side.
- i: A simple vertical line with a dot above it will do, but consider adding a flourish for style.
- o: Form a perfect circle, ensuring that the curvature is smooth and even.
- u: Start with a vertical line, turn down and swoop up to create a rounded bottom.
Practice forming each letter repeatedly, using the prismacolor markers to add color and personal flair. As you gain confidence, experiment with various styles and embellishments to make your calligraphy truly your own.
Connecting Letters
Exploring the art of calligraphy with Prismacolor Premier Double-Ended Art Markers, featuring both fine and chisel tips, can elevate your lettering skills to new heights. When connecting letters to form beautiful words, it's essential to focus on flow and consistency. Start by choosing a style for your calligraphy; cursive often allows for smoother connections, while serif styles may require more intentional lifts between the letters. Using the fine tip for intricate details and the chisel tip for broader strokes offers versatility in how you form your letters. As you practice, try to maintain a steady hand to avoid shaky lines—this can drastically improve the visual appeal of your lettering.
Consistent spacing is key when connecting letters; uneven spacing can disrupt the rhythm of your work. One effective technique involves lightly sketching out your letters with a pencil before committing with the markers. This allows you to adjust the spacing and ensure that each letter flows into the next seamlessly. Keeping an eye on the ascenders and descenders of letters also aids in maintaining uniformity. To enhance the aesthetics, consider these tips:
- Practice connecting letters in a fluid motion, imagining each word as a single stroke.
- Experiment with slant and size variations to create interesting visual dynamics.
- Utilize the chisel tip's ability to create thick downstrokes while using the fine tip for thinner upstrokes to add contrast.
Creating Flourishes
Exploring the art of calligraphy with Prismacolor Premier Double-Ended Art Markers can open up a world of creative expression. When focusing on creating flourishes, start by familiarizing yourself with the fine and chisel tips of the markers. The fine tip offers precision for delicate details, whereas the chisel tip provides broader strokes perfect for impactful embellishments. Consider beginning with basic letter forms, and then let your imagination roam free as you add flourishes that complement each character. A gentle flick of the wrist can transform a simple stroke into an elegant curl or swoosh, enhancing the beauty of your lettering.
When deciding where to place your flourishes, think about balance and flow. Flourishes can be added at the beginning or end of letters, around descenders, or alongside ascenders. They are especially effective in capital letters, where larger forms allow for intricate designs. You might also experiment with the following ideas:
- Integrate spirals and loops around the letters to give a sense of movement.
- Add small dots or hearts at the end of flourish strokes for a playful touch.
- Create a consistent flourish style throughout your work for a cohesive look.
Utilizing the versatility of the Prismacolor markers, focus on varying the pressure to achieve different line thicknesses. This dynamic approach not only makes the flourishes more visually appealing but also adds texture to the overall piece. Think about how colors can work together: use contrasting colors for flourishes to make them stand out or subtle shades that complement the main letter forms. Flourishes that weave themselves into the text can create a stunning visual narrative that captivates the viewer’s eye.
- Experiment with layering colors in your flourishes for depth.
- Use the chisel tip for bold, sweeping flourishes that command attention.
Practical Projects
Exploring calligraphy with Prismacolor Premier Double-Ended Art Markers opens up a world of exciting projects that you can easily undertake. Featuring both fine and chisel tips, these markers are ideal for creating beautifully styled text for various artistic endeavors. Whether you're interested in crafting greeting cards, personalized invitations, or inspiring decorative quotes, the vibrant colors and versatility of these markers make every project a joy to execute. Here are some practical ideas along with detailed steps for two standout projects to enhance your calligraphy skills.
One enjoyable project is designing a personalized greeting card. Start by gathering your materials: a blank card (or cardstock cut to your desired size), your Prismacolor markers, and a ruler. First, sketch out a light pencil layout, positioning your greeting centrally. Choose a phrase like "Happy Birthday" or "Thank You," and use the fine tip for intricate lettering. Once satisfied with the layout, outline the letters with the fine tip and add embellishments like flourishes. Next, you can use the chisel tip to add shading or to highlight certain letters, bringing depth and dimension. Allow the ink to dry before erasing any pencil marks underneath to keep the design clean.
- Materials needed: blank card, Prismacolor markers, ruler, pencil.
- Select a phrase for your card and lightly sketch it out.
- Outline your lettering using the fine tip of the Prismacolor marker.
- Add details and flourish as desired.
A second captivating project is creating wall art with decorative quotes. Begin by choosing an inspiring quote and a canvas or thick paper. Plan your layout by sketching lightly with a pencil. Use the fine tip to carefully write the quote, paying close attention to spacing and style. Consider incorporating different lettering styles within the quote for contrast. After you’ve finished the lettering, go back with the chisel tip for background colors, shadows, or frames to make your quote pop. To finish, let the artwork dry completely and display it on your wall as a stunning conversation starter.
- Materials needed: canvas or thick paper, Prismacolor markers, ruler, pencil.
- Choose a quote and sketch the design layout.
- Write using the fine tip marker and embellish with the chisel tip.
Color Blending Techniques
Exploring the vibrant world of calligraphy with Prismacolor Premier Double-Ended Art Markers, which feature both fine and chisel tips, opens up a realm of possibilities for color blending that can elevate your designs. These markers are especially handy for achieving smooth gradients and stunning ombre effects that make your lettering truly pop. The fine tip is perfect for precise details, while the chisel tip is great for creating broader strokes and achieving a more dynamic blend.
To create smooth color blends, start by selecting complementary or analogous colors from your 12-pack. Begin by applying the first color to the area where you want the most saturation. Next, use the second color on top of the first color while it's still wet; this will allow the markers to blend seamlessly. For hard edges, simply outline your text first and then lightly feather the edge with the second color. To create an ombre effect, choose three colors that transition well into one another. Apply the lightest color first, then the mid-tone, and finish with the darkest shade. Wipe the chisel tip lightly over the transition area to achieve a soft gradient. Consider using these techniques for invitations, greeting cards, or decorative quotes to add a personal touch.
- Use a piece of scrap paper to practice color blending before committing to your final project.
- Experiment with layering colors; allowing one layer to dry before adding another can create beautiful depth.
- For a more defined ombre, layer more ink towards one end and gradually decrease as you move towards the other end.
Related Products


Troubleshooting Common Issues
When exploring calligraphy with the Prismacolor Premier Double-Ended Art Markers, you may encounter a few challenges that can hinder your progress. One common issue is smudging, which often occurs if you’re not allowing enough drying time between strokes or if your hand makes contact with the inked areas. To combat smudging, try using a light touch while writing. Additionally, consider implementing techniques like starting from the outside edges of your letterforms and working inward, which can help minimize the risk of accidentally brushing against wet ink. Allowing your work to dry completely before moving it can also significantly reduce smudging.
Inconsistent strokes can be frustrating when honing your calligraphy skills. This inconsistency might stem from uneven pressure on the markers' fine or chisel tips. To achieve uniform strokes, practice varying your pressure intentionally. Start with light pressure for upward strokes and increase pressure for downward strokes. Experimenting with different angles and positions can also help you master the ink flow. A common problem with these markers is drying out, particularly if they aren’t capped properly. Ensure that you store your Prismacolor markers horizontally and keep the caps tightly secured when not in use. If a marker appears on the verge of drying or isn’t performing as expected, try rejuvenating it by tapping the tip gently onto a scrap piece of paper to encourage the ink to flow.
- Use a blotter sheet to rest your hand while writing to prevent smudging.
- Practice with the markers on different types of paper to find the best surface for smooth writing.
Maintaining Your Markers
To ensure optimal performance and longevity of your Prismacolor Premier Double-Ended Art Markers (Fine and Chisel Tip, 12 Pack), proper care and maintenance are essential. Storing these markers correctly is a critical factor in preventing them from drying out. Always store them horizontally in a flat position rather than upright. This positioning allows the ink to stay evenly distributed between the fine and chisel tips, reducing the risk of one side drying out quicker than the other. If you need to store them vertically, keep the fine tip pointing up to minimize ink flow issues. Using a protective case or a sturdy container can also shield your markers from environmental factors like heat or direct sunlight.
Cleaning up after using your markers is equally important in maintaining their functionality. When working on a project, protect your surfaces with a durable mat or paper to catch any ink spills. If any ink does accidentally stain your workspace, wipe it up immediately using an appropriate cleaner for the type of surface. To avoid the tips becoming clogged or damaged, gently capped them after use, making sure they snap securely to prevent air from entering. Additionally, if you notice that the tips are getting dry or the ink isn’t flowing as it should, revive them by gently placing the tip on a scrap piece of paper and applying light pressure until the ink flows freely again.
- Store markers horizontally for even ink distribution.
- Avoid exposure to heat or direct sunlight.
- Use a protective case to keep markers safe.
- Protect your workspace with mats or paper.
- Cap securely after each use to prevent air exposure.
- Revive dry tips by applying gentle pressure on scrap paper.
Resources for Further Learning
Diving into the world of calligraphy with Prismacolor Premier Double-Ended Art Markers is an exciting journey, and numerous resources can enhance your skills and inspire your creativity. For those who enjoy reading, there are several highly-rated books dedicated to the art of calligraphy. "The Calligrapher's Bible" by David Harris provides detailed instructions and showcases a variety of styles, making it an essential read for anyone serious about mastering calligraphy. Another excellent resource is "Calligraphy Made Easy" by Eleanor Winters, which offers step-by-step guidance for beginners and includes practice exercises designed to build your confidence.
In addition to books, various online courses can take your skills to the next level. Websites like Skillshare and Udemy feature calligraphy classes tailored for all levels. Many instructors focus on using markers, which seamlessly integrates with your Prismacolor tools. Moreover, social media platforms like Instagram and Pinterest provide a vibrant community where you can find inspiration and connect with fellow calligraphy enthusiasts. Search for hashtags such as #calligraphy and #prismacolor to discover a wealth of tutorials and showcases by artists worldwide.
- Books: "The Calligrapher's Bible" by David Harris
- Books: "Calligraphy Made Easy" by Eleanor Winters
- Online Courses: Skillshare and Udemy for structured learning
- Social Media: Explore Instagram and Pinterest for community engagement
- Video Tutorials: YouTube hosts numerous instructional channels focused on calligraphy techniques
- Workshops: Local art centers often offer in-person classes for hands-on learning
Why We Chose This Product
In choosing Prismacolor's Premier Double-Ended Art Markers for this guide, I aimed to equip you with tools that elevate your calligraphy experience. These markers are beloved by artists for their quality and flexibility, pushing you to explore new styles and techniques with confidence. The combination of finely-tuned tips ensures that every letter you craft is not only legible but also visually striking.
- Vibrant colors that ignite creativity
- Dual tips for fine detail and bold strokes
- Comfortable grip for extended use
- High-quality ink for smooth application
By the end of this guide, you'll not only have learned the fundamentals of calligraphy but also discovered a new passion, one stroke at a time!
Prismacolor Premier Double-Ended Art Markers elevate any artistry with their fine and chisel tips, perfect for intricate designs and expressive lettering. This 12-pack offers a wide range of vibrant colors, allowing for creative expression across various projects. The dual-ended design ensures versatility, letting artists shift from detailed lines to bold strokes effortlessly. Whether you're a beginner or an experienced calligrapher, these markers provide a smooth ink flow and rich pigmentation, making them an ideal choice for anyone looking to enhance their artistic journey.