Are you ready to transform your scrapbook pages into vibrant expressions of creativity? With the stylish techniques found in our guide, 'Creating Stunning Mylar Overlay Pages,' you'll unlock a world of imaginative possibilities that will leave your friends in awe! Whether you're an experienced scrapbooker or just starting out, this comprehensive guide will take your projects to dazzling new heights.
Imagine layering shimmering mylar overlay pages into your treasured memories, adding depth and excitement with each turn of your scrapbook. This guide provides clear, step-by-step instructions to ensure your creations are not only visually stunning but also uniquely yours. Get ready to make memories pop off the page like never before!

Scraptastic! is a delightful treasure trove filled with 50 messy, sparkly, touch-feely, and snazzy ways to elevate your scrapbook pages from ordinary to extraordinary. This vibrant collection encourages you to infuse your individuality into every creation while exploring a variety of engaging techniques. From dazzling embellishments to playful textures, the book is designed to inspire both novice and seasoned scrapbookers alike, ensuring every memory is beautifully represented.
Whether you're aiming for whimsical charm or elegant sophistication, Scraptastic! offers something for everyone. The hands-on approach invites readers to experiment, take risks, and most importantly, have fun! With each turn of the page, you'll find new materials, innovative methods, and a sense of community that will make your scrapbooking journey even more enjoyable.
Selecting Mylar Sheets
When diving into the world of creating stunning Mylar overlay pages, choosing the right Mylar sheets is a crucial step. Various types of Mylar sheets are available, each differing in thickness and transparency, which can significantly impact the aesthetics of your scrapbook project. For instance, thin Mylar sheets, like those that range from 2 to 4 mil, provide a delicate appearance and are perfect for overlays that allow more light to pass through. These can enhance the vibrant colors of your scrapbook pages without overwhelming the primary elements. On the other hand, thicker sheets, up to 10 mil or beyond, offer greater durability and can provide a stunning three-dimensional effect, making them ideal for layouts where texture and depth are desired.
Transparency is another vital factor. Clear Mylar sheets allow for maximum visibility of the layers underneath, making intricate designs and colors pop without distraction. Conversely, frosted Mylar sheets introduce a soft diffused look, ideal for creating a subtle backdrop that softens sharp edges and adds dimension to your pages. For those striving for unique effects, colored Mylar sheets can add an exciting splash of color while still allowing some visibility of the details beneath. To find high-quality Mylar that enhances your scrapbooking aesthetics, consider the following sources:
- Local craft stores, where you can touch and feel the sheets before purchasing.
- Online retailers specializing in scrapbooking supplies, often have a wider variety of thicknesses and finishes.
- Custom printing services that offer Mylar prints, providing unique textures and designs.
Design Planning
Creating stunning Mylar overlay pages starts with an effective design plan that harmonizes your vision with the unique qualities of Mylar. Use the "Scraptastic!: 50 Messy, Sparkly, Touch-Feely, Snazzy Ways to Jazz Up Your Scrapbook Pages" guide to explore innovative techniques for translating your ideas into beautiful overlays.
Begin by sketching your ideas on a notepad, letting your creativity flow without constraints. Experiment with various layouts, keeping in mind the dimensions of Mylar sheets. Consider using a ruler for clean lines and proportions. Once you have a rough layout, incorporate color palettes that resonate with your theme. Choosing a cohesive palette can greatly enhance the visual appeal of your Mylar pages. Explore complementary colors that create contrast, or choose analogous colors for a more harmonious look. This selection process not only helps establish a mood but also determines the overall aesthetic of your scrapbook. For a polished final result, think about elements such as:
- Textural effects from the Mylar that can enhance your design.
- The layering technique to create depth and dimension.
- Incorporating different shapes cut from Mylar for added interest.
Finally, establish a theme that ties all your elements together. Whether it’s a seasonal focus, a special event, or a general celebration of life, ensure that every piece of your overlay speaks to this central idea. Collect visual inspiration from magazines, online platforms, or even nature, and create a vision board that captures your intended vibe. This can serve as a reference, helping you stay focused during the design process. As you continue to develop your page, keep an eye out for additional elements such as:
- Interactive components that invite touch.
- Patterns or glitter that catch the eye.
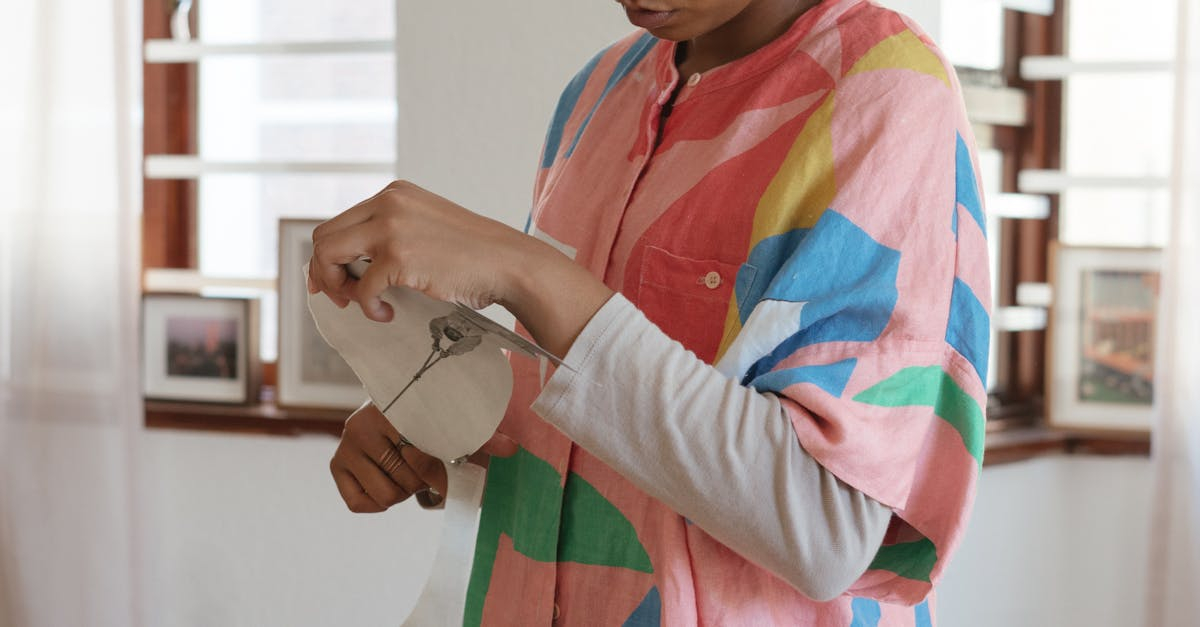
Cutting Techniques
Achieving stunning Mylar overlay pages requires precision and the right tools. For this project, the essential cutting tool is a craft knife or precision cutter, such as the X-ACTO knife. This blade is ideal for making straight cuts or intricate designs on Mylar sheets due to its sharpness and control. Alongside the knife, having a cutting mat is crucial to protect your work surface and ensure clean cuts. A ruler, preferably metal, can assist in guiding cuts for even, straight lines. Lastly, consider investing in a heavy-duty pair of scissors, particularly ones designed for thicker materials. These scissors can provide a more substantial cut when handling larger sheets of Mylar.
When cutting Mylar, it’s important to work carefully to maintain clean edges. Begin by measuring and marking your desired dimensions on the Mylar sheet with a non-permanent marker or pencil. Use the ruler to draw straight guidelines before cutting. For safety, keep your fingers clear of the blade and always cut away from yourself. If you’re using a craft knife, apply consistent pressure while cutting to achieve a clean edge, and avoid dragging the blade. If you experience any resistance, lift the blade and re-approach the cut rather than forcing it through. Following these techniques ensures precise cuts, enhancing the overall aesthetics of your scrapbook pages.
- Use a self-healing cutting mat to prolong the life of your blades.
- Consider pre-scoring the Mylar with a lighter blade to make cutting easier.
- Store your cutting tools properly to maintain their sharpness.
Inking Mylar Pages
Inking Mylar pages can elevate your scrapbooking projects to new heights, providing that perfect mix of shimmer and unique texture that captures attention. When you choose the right ink or stamps, the vibrancy of your designs becomes even more pronounced. Start by selecting inks that are specifically designed for non-porous surfaces. Ink types such as StazOn, Versafine, or even acrylic paint can work well on Mylar, providing both adherence and vivid color saturation. When working with rubber stamps, be sure to use permanent or solvent-based inks to prevent smudging. Applying the ink with an even pressure ensures a clean impression without excess ink pooling on the glossy surface.
Give special attention to drying times; Mylar can take longer to dry than paper, which means proper patience is essential to avoid unwanted smudges or fingerprints. For optimal results, you can use a heat gun to expedite drying, ensuring a durable finish. Remember to allow your first layer of ink to dry completely before adding any additional designs or layers. This prevents colors from bleeding into one another, creating a more polished final product. Here are some additional recommendations to keep in mind:
- Test your ink on a scrap piece of Mylar before working on your actual project.
- Use a gentle touch when applying stamps to avoid excessive ink transfer.
- If a mistake occurs, quickly wipe away the ink with rubbing alcohol before it dries.
- Consider adding a sealant once fully dried to protect your designs from wear and tear.
Texture and Layers
Creating stunning Mylar overlay pages can elevate your scrapbook projects from ordinary to extraordinary. Adding texture through mixed media techniques is a transformative way to engage the senses and give your pages a unique flair. To start, consider incorporating various materials such as fabric, glitter, or textured paper, all of which can bring depth and vibrancy to your overlays. Using transparent Mylar sheets as a base allows colors and patterns underneath to peek through, creating visually captivating results.
Begin by layering lightweight fabrics, such as lace or muslin, beneath the Mylar. This adds a soft texture that contrasts beautifully with the smooth sheen of the Mylar. Glitter can also be utilized in fun and inventive ways. For example, apply a thin layer of adhesive to specific areas of your Mylar and sprinkle glitter over the top to create a shimmering effect that catches the light, enhancing the overall look. Textured papers, such as embossed cardstock, can also be cut into shapes or strips and layered beneath the Mylar for additional dimension. Utilize these bullet points to guide your layering process:
- Choose a color palette that complements your theme.
- Experiment with different textures; for instance, pair burlap with shiny Mylar for an intriguing contrast.
- Use stencils or stamps with ink or paint on the Mylar to create patterns.
Adhesive Choices
When creating stunning Mylar overlay pages for your scrapbook, selecting the right adhesive is crucial for achieving a flawless finish. Two popular types of adhesives that complement Mylar beautifully are tape runners and liquid adhesives. Tape runners, like the Tombow Mono Adhesive, offer a quick and convenient way to apply a strong bond without the mess of traditional glue. They dispense a thin line of adhesive that, once pressed onto your Mylar, won’t cause it to warp or buckle, ensuring your design remains smooth. The repositionable variants allow for slight adjustments, providing flexibility during your creative process, while permanent ones secure your overlays firmly.
Liquid adhesives, such as Aleene's Tacky Glue, are another excellent choice when working with Mylar. These glues typically have a fine tip applicator, which gives you the precision needed for detailed work. Applying them in a thin layer helps prevent unnecessary wrinkling and rippling in the Mylar. It's essential to avoid using too much product, as this can saturate the material and cause it to lose its structure. To achieve the best results with either adhesive type, consider the following tips:
- Test the adhesive on a scrap piece of Mylar first to understand how it interacts with the material.
- Apply the adhesive evenly to avoid lumps that can lead to visible imperfections on your page.
- To prevent wrinkles, use a bone folder to smooth out the Mylar after applying it, pressing gently from the center outwards.
- Allow the adhesive to dry thoroughly before adding any additional embellishments or layers to prevent lifting.
Accent and Embellishments
Creating stunning Mylar overlay pages requires the right combination of embellishments to elevate your scrapbook design. When considering accents, sequins offer a playful and eye-catching element. Their sparkle enhances the Mylar’s reflective quality, drawing attention to key areas on your page. For optimal placement, consider clustering sequins in corners or framing important photos to create a focal point. Various colors and sizes can be mixed together for a more dynamic look, ensuring that each element works harmoniously with the translucent nature of the Mylar.
Beads are another fabulous option for enhancing your Mylar overlays. They add dimension and texture, enriching the overall tactile experience of your scrapbook. Use smaller beads for more detailed designs and larger ones for bolder statements. You can sew or glue them along the edges of the Mylar or create trails that guide the eye across the layout. Incorporating washi tape or ribbon as additional decorative elements provides contrast against the Mylar, allowing for layering that adds visual interest.
- Play with various shapes and sizes of sequins and beads.
- Experiment with layering washi tape, ribbon, or fabric for a mixed-media effect.
- Cluster embellishments for concentrated areas of interest.
- Create embellishment trails that lead across the page.
- Consider color coordination with your Mylar overlays to create a cohesive look.
Related Products


Creating Depth
Creating stunning Mylar overlay pages can elevate your scrapbooking projects, adding visual intrigue and a three-dimensional effect that captivates viewers. One effective method is to layer different materials, such as textured paper or fabric, with Mylar sheets to enhance depth. Begin by selecting a vibrant Mylar sheet that complements your chosen color palette. Place it over your base page and secure it at one edge. Use adhesive dots or foam tape to elevate the corners and selected areas. This lifting technique generates an air space beneath the Mylar, introducing a mesmerizing shadow that enhances the dimensional effect.
Utilizing shadow effects opens up further creative avenues. After adhering your Mylar overlay, add embellishments like stickers or die-cut shapes both below and above the Mylar. This layered approach gives the impression of depth as some elements appear to sit beneath the translucent layer while others project out, combining textures and glimmer in a visually appealing way. Experiment with varying heights and materials to see how the light interacts with different layers, creating stunning effects. Consider these additional tips:
- Incorporate different shades of Mylar for a gradient effect.
- Mix flat items with mixed media like ribbons or small trinkets for contrast.
- Use a light source to highlight shadows creatively.
Finishing Touches
Creating stunning Mylar overlay pages involves adding final flourishes that elevate your design from simple to spectacular. One technique is to incorporate themed stickers that complement the overall layout. Choose stickers that add depth—embossed or textured options can make your overlays feel more dynamic. Ensure the stickers are securely adhered to avoid peeling. Consider layering stickers for added interest; a simple flower sticker placed over a heart can create a beautiful focal point.
Incorporating journaling spots allows for personal touches that enhance the storytelling aspect of your scrapbook. Use decorative washi tape to frame these spots, giving them a finished look while also providing contrast against the Mylar. Elements like embellishments—glitter, twine, or even buttons—further contribute to the texture and visual appeal of your pages. Think about the balance of colors and textures as you add these accents. Remember, every decoration should serve to enhance the overall aesthetic rather than overwhelm it.
- Experiment with different layouts for stickers to find the most pleasing arrangement.
- Utilize a variety of journaling spot shapes and sizes to create visual diversity.
- Incorporate ribbons or lace for a touch of elegance and softness.
- Use glitter pens for handwritten notes to add sparkle directly to your words.
Photographing Finished Pages
Creating stunning Mylar overlay pages for your scrapbook is only half the journey; capturing their beauty through photography requires attention to detail. To really showcase the sparkle and depth of the Mylar in your scrapbook, consider these essential tips that will elevate your photography game. Good lighting is crucial, so shoot in natural light whenever possible. Aim to photograph during the golden hour—this is a magical time just after sunrise or just before sunset, when the light is soft and warm. If natural light is unavailable, use softbox lighting to mimic it, ensuring to diffuse the light to avoid harsh shadows which can detract from the sparkle of the Mylar.
Paying attention to angles can transform a standard photo into a captivating one. Try photographing from various angles to find the most flattering perspective. A slight tilt or close-up can reveal details that will highlight the texture and shine of your overlay pages. Additionally, incorporating props can add interest; use complementary items like washi tape rolls or scissors to enhance the visual narrative. Post-shoot, editing comes into play. Use software like Adobe Lightroom or Photoshop to fine-tune brightness and contrast, ensuring the lively colors pop without losing the intricate details of the overlays.
- Utilize a tripod to maintain stability and avoid blurriness.
- Experiment with different backgrounds to enhance contrast against the Mylar.
- Use a macro lens for extremely close-up shots that capture texture.
- Apply a soft focus effect around the edges during editing for a dreamy look.
Why We Chose This Product
Choosing 'How to Guide: Creating Stunning Mylar Overlay Pages' was an easy decision because this innovative approach brings a delightful twist to traditional scrapbooking. By embracing the versatility of mylar, your pages can come alive with textures, colors, and reflections that invite touch and admiration. The techniques explored in this guide will encourage you to step outside your comfort zone and discover the thrill of mixed-media crafting!
- Encourages creativity and self-expression
- Perfect for all skill levels
- Inspires fresh ideas and techniques
- Enhances the emotional impact of your memories
With each project, you’ll gain confidence in your abilities while producing stunning outcomes that spark joy. So dive in, embrace the messiness of creativity, and watch as your scrapbook pages reflect your personality like never before!
Scraptastic! is a delightful treasure trove filled with 50 messy, sparkly, touch-feely, and snazzy ways to elevate your scrapbook pages from ordinary to extraordinary. This vibrant collection encourages you to infuse your individuality into every creation while exploring a variety of engaging techniques. From dazzling embellishments to playful textures, the book is designed to inspire both novice and seasoned scrapbookers alike, ensuring every memory is beautifully represented.
Whether you're aiming for whimsical charm or elegant sophistication, Scraptastic! offers something for everyone. The hands-on approach invites readers to experiment, take risks, and most importantly, have fun! With each turn of the page, you'll find new materials, innovative methods, and a sense of community that will make your scrapbooking journey even more enjoyable.